Lollipop Lollipop

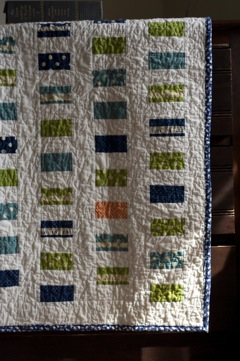
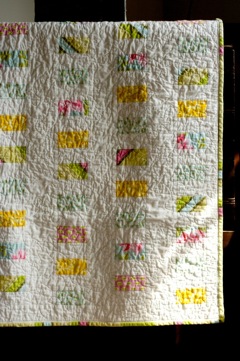
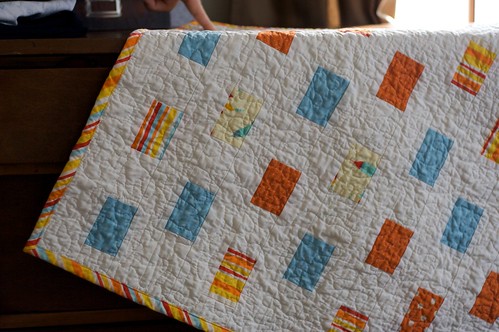
I have finished another quilt! WOo Hoo! This one is headed to a coworkers little girl who just had a birthday. It has been awhile since I quilted and there were a few things I forgot…

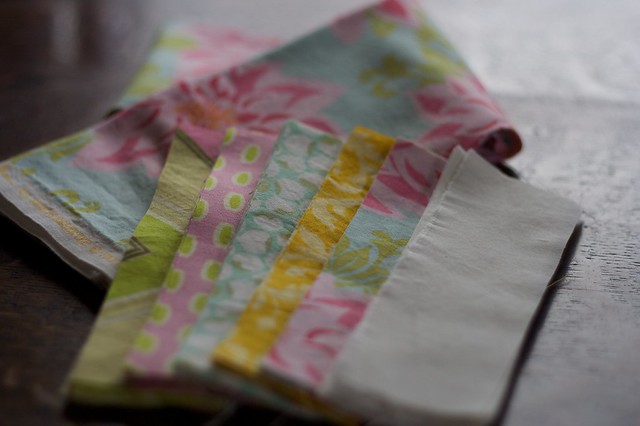
1. Trust your gut on fabric choices, if you spend too much time fretting you’ll never get started

2. If you haven’t freehand quilted in awhile you should definitely practice before you take your quilt anywhere near your machine.

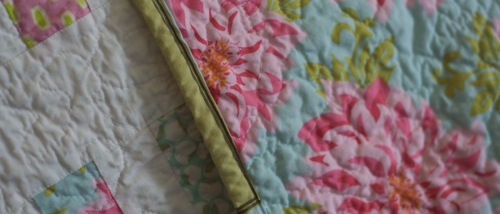
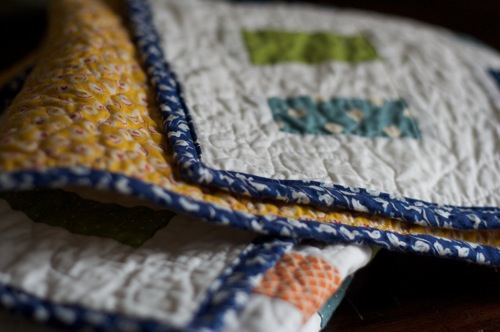
3. If you choose to piece your binding as I did take the extra time to measure out where your seams will be so they don’t end up at a corner. This, as you can imagine, will save you lots of headaches in the end.

4. Make sure you have a full bobbin when you start to quilt, for a baby quilt I usually have to fill the bobbin 3 times, but nothing is worse then getting started and having to change it right off the bat.

5. Check the status of your batting stash before you start. I switched to an all natural batting a couple months ago and I LOVE it. It’s so soft and inviting, unlike the scratchy polyester version. The only drawback is the price, a hefty $12/yd at my local Hancocks. So I wait for it to go 50% off and stock up, but I’ve missed that sale the last few times and am running low. I’m hoping for a sale this weekend! Keeping my fingers crossed!

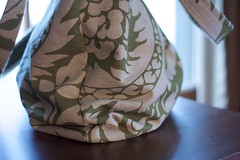
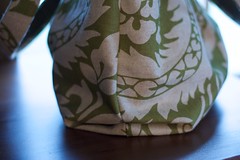
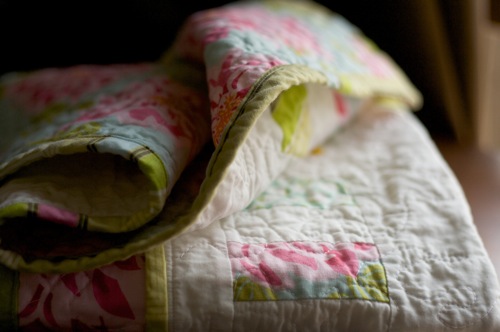
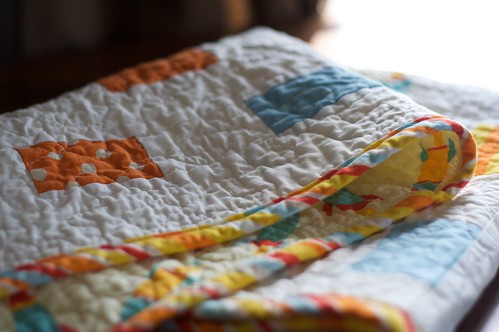
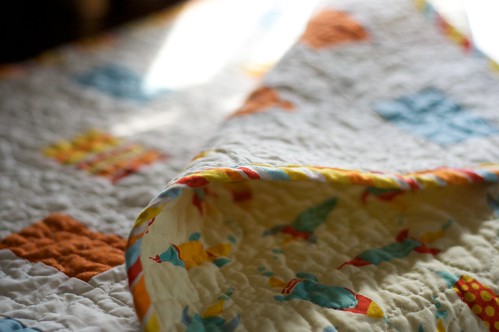
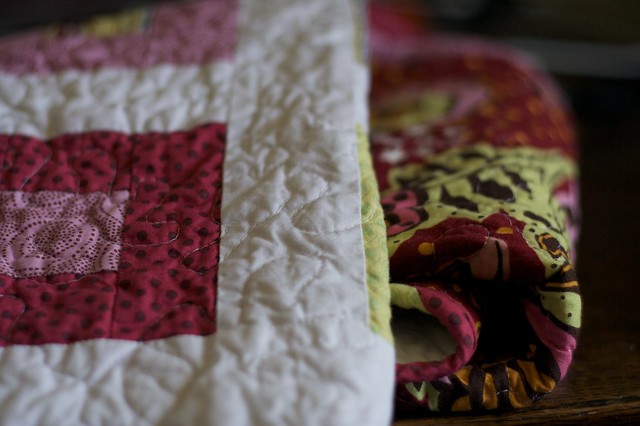
The front of the quilt is a mix of fabrics coordinated off of the backing which is from the Chocolate Lollipop line by Anna Maria Horner for Free Spirit. I really like the stripe, which was a last minute substitution, I think it pulls it all together and keeps it from being too girly.

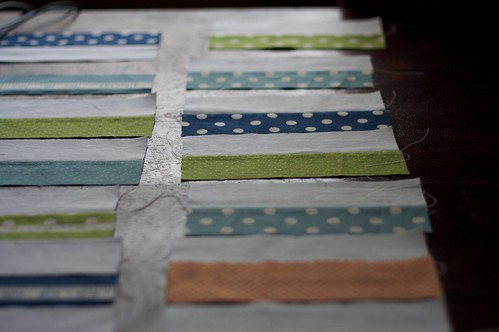
As usual I have a million projects started, including 3 quilt tops or “floppies.” I saw that term used on one of the quilting blogs I read and I can’t for the life of me remember who, but I thought it was an appropriate name for the tops to quilts that have been pieced and are waiting for batting, a back and to be quilted. None the less I think things might finally be starting to get in a rhythm around here, so hopefully the posting will become a bit more consistent!

My Very Own Font

Matt has a knack for finding things he thinks I would like on the internet, little programs that would make my life easier. And I usually blow them off and then 6 months later I say “Hey wouldn’t it be neat if there was someway I could ________”

One particular instance of this popped up today. Often when I am making things on the computer I think that it would be great if I could have something appear in my handwriting. Sure you can write and scan the image but it inevitable involves lots of grumpiness and a less then impressive outcome. I was talking about wanting to change the website a bit and was lamenting the lack of font choices when Matt reminded me of a site he had found that lets you make your own font.this site. It takes your handwriting and turns it into a font that you can use just as you would Helvetica. It’s awesome and even more exciting it is free, but not for long!

Below is the completed template they provide. You have to stay within the lines, like writing on a Big Chief tablet, so I drew lines very lightly with a pencil before I filled in the characters. Make sure you erase them before you scan though!

My own font

I have grand plans for this font, but right now this little sample will have to do.

Picture 4.png

So once again Matt saved the afternoon, he’s kinda great that way!

Great Kitchen Gadet

On a recent trip to Crate & Barrel I came away with a number of items, an entire bag for under $40 as a matter of fact. My favorite of which is the Die Cast Zester-Stripper. I’ve been looking for a zester for awhile, but couldn’t bring myself to justify the $20+ price tag. When I came across this one for a very reasonable price I though I’d give it a whirl. If you need zest there is an extra step as you will have to chop the zest ribbons that you get from pulling the zester across the rind. But it also creates those ribbons that are pretty and surely have a good use!

I found it particularlly useful when giving these cookies a trial run. The picture below is not mine, but rather one from Martha. When I made them last night the flavor was AMAZING, but the texture was a little off and they had some uneven browning. Thus no pictures from me because they weren’t pretty! But I certainly think they deserve another try. If you do give them a try I reccommend chilling the dough after it’s mixed and again after you form the balls. And as for the size I think they would be better smaller, maybe using 1/2 tablespoon of dough instead of a full.

Picture 1.pngml0804_0804_lemon_poppy_l.jpg

NEW Purse Day!

Last years spring purseSo I have been contemplating a new purse, partially because my old one has become an embarrassment and partially because it’s spring (almost) and I decided that was reason enough.

Last year I made this purse

It was cute and certainly a learning experience! But it lived a long spring and summer and is starting to show it’s age. Which lead to the time consuming task of deciding on a pattern and fabrics for new purse. I had been eyeing the exterior fabric for awhile and though this would be an excellent time to utilize it. It’s a heavy linen, so you can see the weave, and the oatmeal is a nice background to the green. The pattern is similar to the polka dot purse I started… but have yet to finish.

Spring Purse

It’s not intended to be reversible, but turning it inside out was the best way to get a photograph. The pockets are from two different fabrics from my stash (which is getting out of control with my new addiction to quilting). And as per usual I put in a couple slips to keep pens from getting lost in the bottom.

Spring Purse InteriorSpring Purse Interior 2


As you can see the bag is on the slouchy side and I’m ok with that. It is the perfect size to carry a book or two and possibly some fabric that I might buy over lunch… But I found myself wondering if it would be better to sew a seam at each corner to make it a little more boxy. The photos below show the way it is now and how it might look with the added seams. Any thoughts?

Spring Purse 2Spring Purse 3

Check

Have I ever mentioned how I like to make lists… more importantly checking things off of lists. I have been known to write things down that I have already done just so that I can immediately check things off. It makes me feel productive, even if “taking a shower” was the task completed.

IMG_4336.jpg

Today I checked two big items off my list. The two baby quilts I was working on are done. And much like the first they are adorable! I will have a hard time parting with them, though I know that will all be going to wonderful homes with sweet and cuddly new babies. These two are going to a set of twins, a boy and a girl, just down the highway.

IMG_4343-680x1024.jpgIMG_4349.jpg


I really like the coin pattern, but I’ve had some spare time on my hands and came up with a few new ideas for quilts that I can’t wait to start on. I decided to make my own bias tape, that way I could use a fun fabric instead of the solid varieties found at the fabric store. I used Heather Bailey’s tutorial found here. It’s excellent, very easy to follow and makes your quilt truly a custom creation. For now I’m going to stick to making baby quilts, they are less daunting than their larger counterparts. And I think I’ll put some in my Etsy shop and maybe even keep a few in reserve for emergency gifts!


IMG_4351-1024x680.jpgIMG_4333-1024x680.jpg

One down… Two or Three to go

I could not be more pleased with the way this quilt turned out. I freely admit I was worried, but when it came out of the dryer I broke into a grin and did a little dance!

As the title of the post implies I’ve got a few more to get done, everyone I know seems have a new bundle of joy. There are a few things I learned on this one that I will change for the next, and a more detailed post will follow, but I wanted to share these pictures as soon as possible!

Rocket Baby Quilt

Rocket Baby Quilt 2

Rocket Baby Quilt 3

Weekend Update

We were excited about the idea of a sunny spring like weekend. But mother nature intervened with rain… lots and lots of rain. So we made due and altered our plans, which was probably for the best because there are quite a few things on the perpetual list. Luckily I was able to check a few of those off!

A high school friend of mine just had twins! A little boy and a little girl! So naturally I decided that they each needed a quilt. I hmmmed and haaaed for awhile before I choose these fabrics. For Madelyn I found these coordinating prints from Heather Bailey. They are bright and cheery and spring-like.  And for Tyler I opted for primary colors and polka dots.

the start of the next quilt 

Baby Boy Quilt... Pieces

I knew the basic pattern I wanted to follow, but I ran out of graph paper while mapping it out so I choose to use the magic of Illustrator to come up with this…

coin quilt pattern

Once I finish piecing the top I will be ready to quilt it. Which will be much easier with the handy addition of curved safety pins. If you haven’t heard of these they are amazing! Because the bottom is curved the pin doesn’t pull the fabric. You can find them here, though I would bet you can find them at any local or chain fabric store.

With any luck I should get both tops done this week!

A How-to with Zippers!

Zippers are probably the scariest thing I can think of. Not for any real reason, but just because. So when I was presented with the opportunity (read challenge) of inserting one into a pouch for a power cable I thought it was time to face my fears. And I must say that it wasn’t bad, though it could have been a disaster without the guidance of the kind souls at Sarah’s. The trick is to add tabs to the end of your zipper before you sew it to anything. That way when you sew your corners you are not trying to work around an unruly zipper.

The instructions below demonstrate how I put a zipper into the pouches I make. Note that you will need to adjust the lengths and widths to fit the item you are working on!

Zipper Insertion Tutorial step #1

Step 1: Cut two strips of fabric the width of your zipper (usually 1 inch) and about 2 1/2 inches long. Pin the right sides of the fabric to the top sides of the zipper, making sure to line up the edges at the ends.


Zipper Insertion Tutorial step #2

Step 2: Sew together, using a straight stitch. Don’t be afraid to sew right up to the stoppers on the zipper. *Make sure you use your zipper foot, it allows you to get much closer to the physical zipper.


Zipper Insertion Tutorial step #3

Step 3: Remove pins and press the fabric back on each end. You should have a nice clean seam starting right behind the metal stops of the zipper.


Zipper Insertion Tutorial step #4

Step 4: Pin the right side of the exterior fabric to the top side of the zipper. Again making sure that the edges line up. Sew along the entire length with the zipper foot. At the ends you will be sewing two pieces of fabric together rather then zipper to fabric. *This step should be pinned and sewn one side at a time.


Zipper Insertion Tutorial step #6

Step 5: Remove pins and press each side back from the zipper.


Zipper Insertion Tutorial step #7

Step 6: Pin the two pieces of exterior fabric together, starting at the bottom and working your way around and up the sides. When you get to the top it may seem that you have extra fabric but just go with it, once you turn the item right side out it will make sense.


Zipper Insertion Tutorial Final Product!

Step 7: Tie and trim off all threads. Turn right side out and admire your beautiful corners. If everything was line up right you should see a little triangle of fabric sandwiched between the zipper and your two exterior sides.


While these are the perfect size to hold a Mac power cable, even with the extender cable, they could be used for anything. A make-up bag, a pencil case, or a small catchall to slip in a larger bag… Hopefully these too will be making an appearance in my Etsy shop soon!