Hobos & Handbags

It’s been awhile coming but I recently finished up a couple purses. One is a slouchy Hobo style, large enough to carry a basketball in and the other is a wooden handled handbag, roomy enough for the daily necessities.

Hobo bag

The hobo bag is made from a canvas weight fabric from Michael Miller. And while I am usually not inclined to put black and white prints on the outside of things, because I worry they will show dirt quickly, this print will mask the grit and grim purses always seem to collect. The interior is flanked with two good sized pockets and a pen slip, which will hopefully cut down on time spent digging for pens in the bottom of your purse. I originally thought I would use a big fabric covered button to close the purse, but finally opted for a magnet on the inside. There was also a bit of trial and error with the straps. The end result, fabric covered webbing, should result in a sturdy and long lasting strap.

Hobo bag

Hobo bag

Hobo bag

As for the other purse the only real hiccup came with the handles. You would be surprised how hard it is to find wooden handles that aren’t pretend bamboo. There are many cute styles out there, but they are plastic and who wants that? The ones I finally found are a nice size, large enough to fit your arm through but not so big they take over the bag.

Wooden Handle Handbag

Wooden Handle Handbag

Wooden Handle Handbag

Wooden Handle Handbag

I’m thinking of adding some of the hobo style to my etsy shop in the near future, though I am again vowing to finish the projects I have started before I embark on new ones!

Digging Out

While the posting has been light I have been busy. I have been finishing up some Christmas purses… Which I am proud to say will be in the mail tomorrow! And I’ve been toying around with expanding my wares on Etsy. And I have a mountain of new fabrics that are sitting, washed and waiting for me to feel productive.

New collectionHoot


I’ve been inspired by Nettie at A Quilt is Nice to make a coin quilt. Though I’m not sure if I want it to be random with scraps I have stashed away or if I want it to be a little more coordinated. I love the way hers looks and I like the idea of having small pieces of other projects all rolled up into one.

But before any quilts get made I HAVE to do something with this zinnia fabric. It didn’t even make it to the shelf at Sarahs before I snatched up a yard of it. It’s designed by Paula Prass for Michael Miller. And with the two tone turquoise and black petal pieces I can’t decide if it needs to be a laptop sleeve or a purse first!

Poppies

There might have to be a moratorium placed on fabric purchases until I get through the piles I have right now. Which will be sad but I can manage.

Valentine’s Day Treats

I had grand intentions of posting this stuff BEFORE the 14th, that way if anyone was inclined they could make their own… but we all know that that was a little ambitious. So you’ll just have to file this away for next year!

The complete set

My mom and I always say that we will start the cookie process earlier, so that we aren’t up until 2am cutting out little hearts but we never seem to make that happen. Though this year I did plan ahead a little. I spent Wednesday night mixing up doughs to place in the refrigerator overnight, gluing little strips of paper to clothespins and cutting out little hearts. I still had quite a bit to do Thursday night… and Friday morning before work, but the chaos was under more control than usual.

This years goodies consisted of the same sugar cookies that my mom and I have been making for the past 20+ years, and the most amazing chocolate cookies ever. The recipe for the chocolate cookies came from Cook’s Illustrated magazine. They were advertised as the perfect balance of chocolate and chewiness and they did not disappoint. A sidenote : it appears that the website requires you too sign up for a free 14 day trail to view the recipe. I did however see this recipe while I was on there and I think these will have to be tested!

CHewy Chocolate CookiesClothes pin detail


As for packaging, which I think is equally if not more important then the sweets inside, I found some great paper bags over at Nashville Wraps. You can’t beat 500 bags for under $20. And their “Value Double Faced Satin Ribbon” is amazing, especially for the price. If you have any pretty packaging needs I recommend requesting a catalog. As for closing the bags I was unsure of what I wanted to do. Then I remembered that I had a HUGE bag of clothes pins I had bought for another project. So I cut strips of paper and glued them to the pins and put a coat of Mod Podge on top to seal them. I used coordinating papers to make tags and label the contents of each bag.

I didn’t get as many cookies made as I had hoped, things are tricky when you’ve got an 8-5 job! Maybe next time I will plan a little better… maybe!

Hello Internet!

So I have taken a bit of a break… though I did not intend to be quite so neglectful. I have a “real” job now and this whole 8-5 thing takes some getting used to. And then the holidays came and if you are anything like me things are just now starting to get back to normal!
I’ve been chipping away at some projects and as always coming up with new things that I don’t really have time for. Below is a sleeve I just completed for one of my favorite customers on Etsy. I think it’s adorable, especially with the heart on the button!

Heart MacBook SleeveHeart MacBook Sleeve #2

specialorderlogo.jpg

Matt received a Wacom tablet, basically a pen that works like a mouse, for Christmas and was nice enough to let me use it… I wanted to come up with something to distinguish the custom orders from the regular items in my etsy shop. I’m happy with the result and it involved minimal yelling at the computer.

I have also decided to try my hand at knitting. I’ve tried in the past, but I didn’t have a specific goal so it never amounted to much. This time however I’ve got a goal and even a pattern! Quite a few people I know are expecting little ones in the coming months and since babies come with hats I thought I would attempt a few. I should also note that the local yarn shop, the Yarn Barn, offers a variety of classes that I am thinking of partaking in. This is what I have so far:

Because I need one more thing to do

I am off to be productive, there a few Christmas presents that still need to be finished… But I will return and hopefully before Easter!

Busy Busy Bee

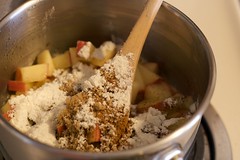
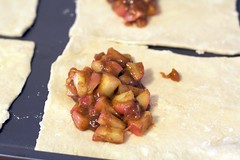
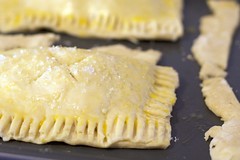
I have a habit of starting projects and forgetting about them. But this week I have been trying to tidy up loose ends. Purses, quilts you name it I’ve been elbow deep in the closet. I have also been cooking up lots of cold weather food.

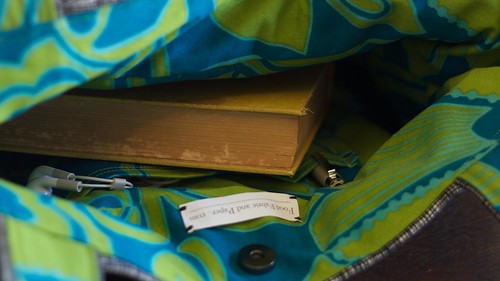
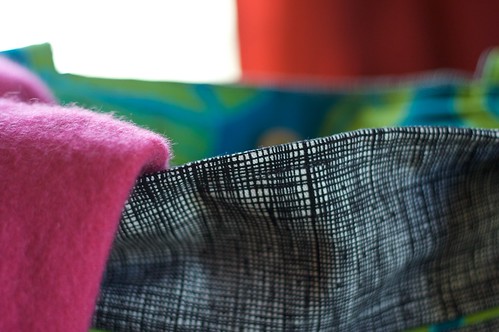
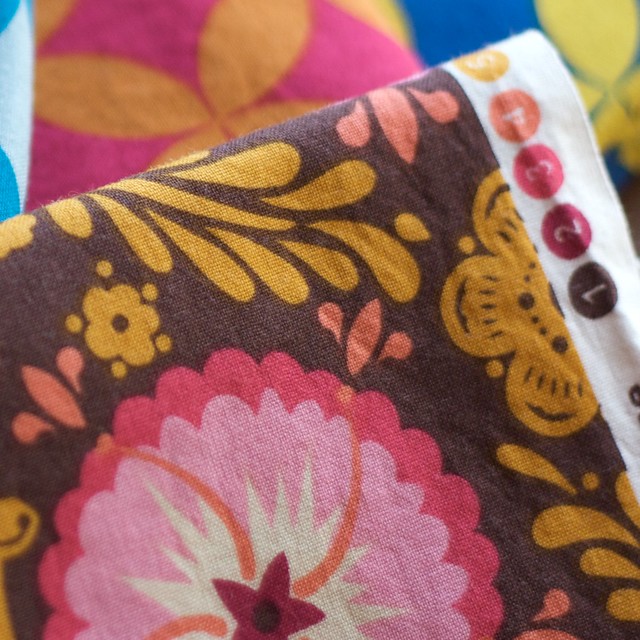
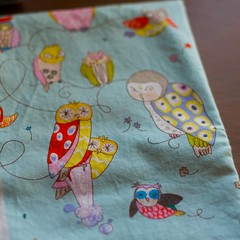
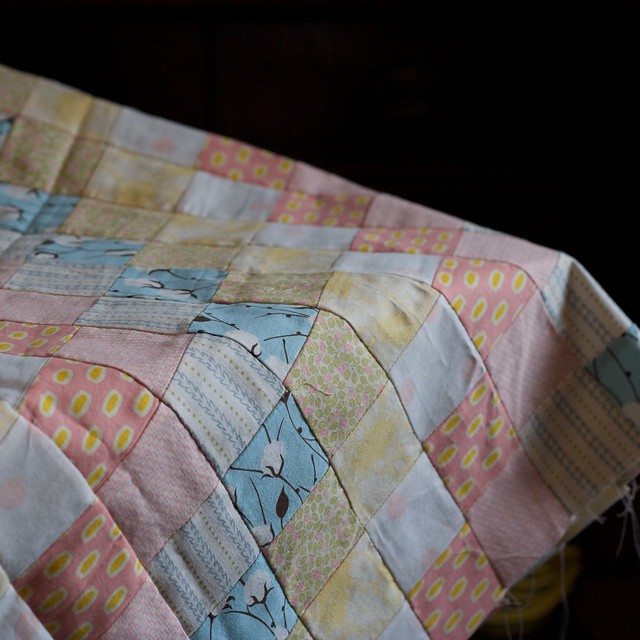
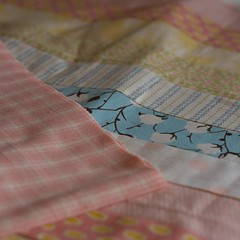
1st: The baby quilt. I finally got the top all pieced together. And found that I had extra fabric, which when sewed together makes a perfect little stroller blanket! I have not actually “quilted” it yet, that part is still a little daunting. But I have found the perfect fabric for the back. A light pink and white plaid flannel. Because every little girl needs more pink! This weekend is supposed to be chilly so I shall be leaving the house as little as possible so there is hope it might be finished and in the mail by Monday. Or maybe I will just enjoy a good book and lots of cocoa!

Baby QuiltExtra quilt and backing

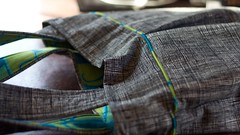
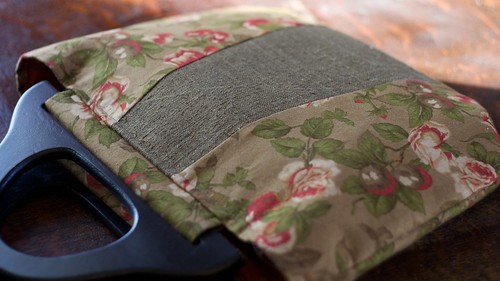
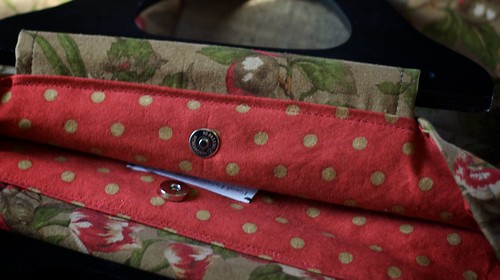
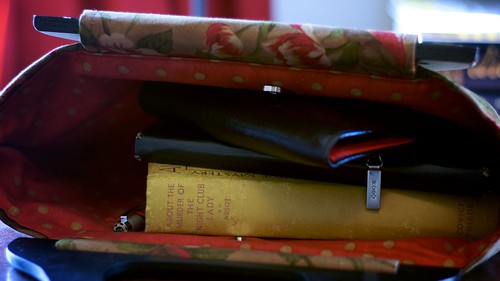
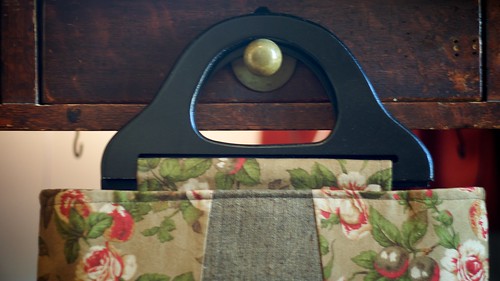
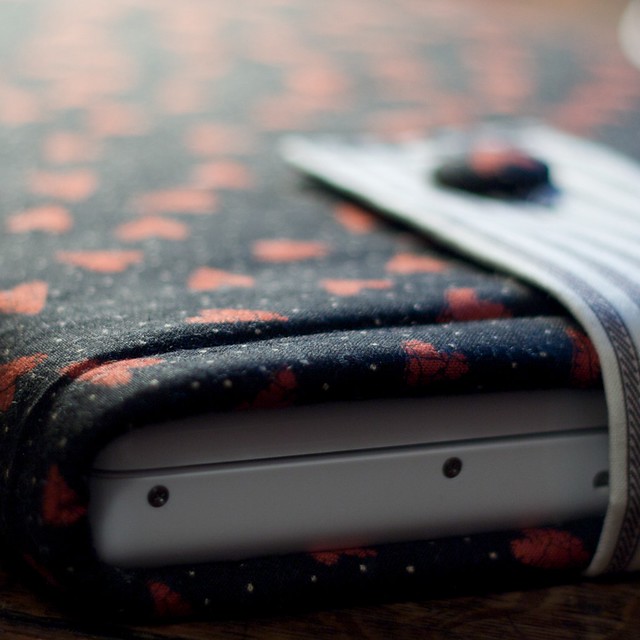
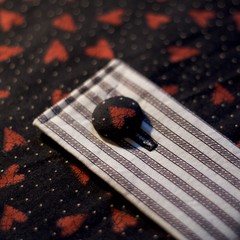
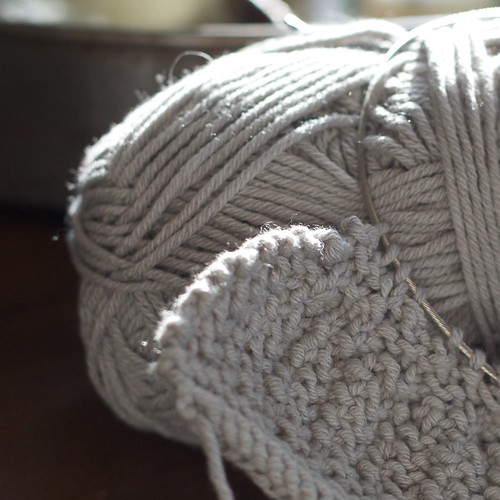
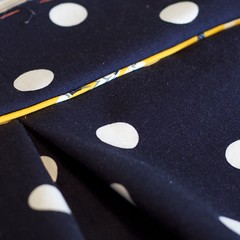
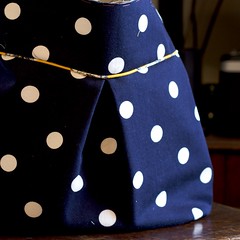
2nd: The corduroy hobo bag. As I was pinning the bulk of the bag to the cap I thought “What if I added contrasting piping?” I found some leftover cording and started basting. It is by no means finished, but I am THRILLED with the progress so far. It just adds more interest to the exterior of the bag. I am also happy with the structure of the bag. At the advice of Sarah I used canvas inside this bag instead of an iron-on or sew-in interfacing. It lets the bag stand on it’s own with just the right amount of slouch. Hopefully it will be up on Etsy soon!

Corduroy Polka Dot Purse UpdateCorduroy Polka Dot Purse #4

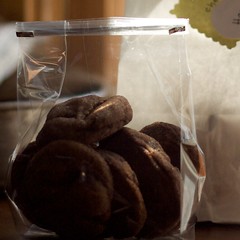
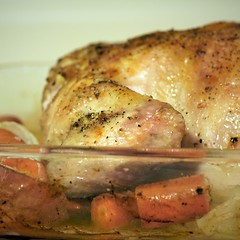
3rd The best mashed potatoes EVER! Generally I don’t buy groceries at Target, though it’s hard to resist the Archer Farms packaging. But I was there the other day and found a all natural fryer for under $4. Yes $4. The first incarnation was chicken roasted with onions, carrots and apples, rubbed with butter and garlic. It was delicious, especially when paired with Pumpkin Potatoes. That’s right, mashed potatoes with pumpkin puree. Think sweet potato casserole but way better. The second use was for Chicken Noodle Soup, which is pretty self explanatory, but I was able to make quite a bit of stock to be used for rice and couscous later. And the remaining chicken was folded into a pasta dish that has provided great leftovers! All of that based around a $4 chicken.

Key IngrediantsRoasted Chicken

Amazing side dish

Pumpkin Potatoes:

4 good size potatoes diced, I keep the skins on
salt & pepper
milk
butter
1/2 can of pumpkin puree
nutmeg, freshly ground is possible

Boil potatoes till fork tender. Drain and mash, I decided to put mine in the Kitchen-aid to whip, it went very well! Season with salt and pepper, add in pumpkin. Mix again and add butter and milk till the consistency and taste you like is achieved. Lastly add nutmeg, don’t skip it, it adds another dimension. And makes it taste festive!

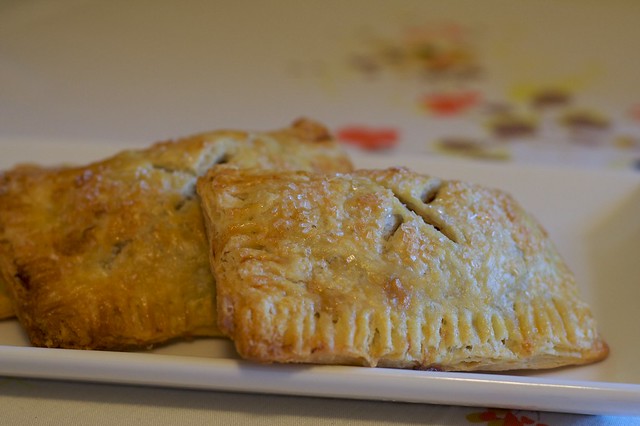
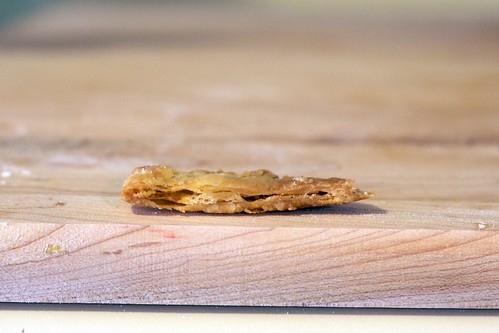
Note :: I wanted ricotta cheese in the pasta dish but didn’t have any and didn’t want to go to the store, so I improvised. I thought I had heard that cottage cheese could be substituted so I proceeded with a little apprehension by Matt. Before boiling the pasta I scooped a cup of cheese into a fine mesh colander and let it drain until I was ready to fold it in. I was quite impressed with the result and had I not told Matt I’m not sure he would have realized.

In the works…Hobo Bag

With polka dots of coarse! Somehow I had never seen this fabric before. I love corduroy, possibly because there were a lot of corduroy jumpers in my wardrobe as a little girl, but I have been having a hard time finding good colors of corduroy. Black and red are easy enough to find and there is an adorable apple print around but it is a bit too juvenile for the purse I want to make. But as I was searching for Possum (the friendly cat) I found this great corded fabric. Sarah told me it’s not technically a corduroy, but it feels like a thin well corduroy. Anyway in dark navy blue with quarter size white polka dots I could not resist!
New Purse FabricEarly pattern


I knew I wanted to make a purse out of my new find but was drawing a blank on what to pair with it. My first inclination was a red and white print, but that seems too patriotic and not the look I was going for. I decided, with a little help, that yellow would be a good choice. Crisp and clean. I think the floral will be a great interior, enough interest and depth without overpowering the bag. And the navy ticking will be pockets inside.

As for the shape, I cut a simple pattern out of muslin to get an idea of size. I am thinking a “Hobo” style, a little slouchy, with a thicker band around the top. Maybe an inverted pleat? Maybe a large fabric covered button with a loop to close? One strap or two? I’m not sure yet! Any suggestions?

Best Pie Crust EVER!

Baked but still warm...

From time to time I make pie, though as of late (the last year or so) I have been having a rough time with pie crust. Sometimes it would shrink too much while baking and other times it “melted” into a pool in the bottom of the pie plate. One occasion was so bad that I actually had to buy a frozen crust. Yes I admit it, I bought a pre-made pie crust. For those that know me you can understand the gravity of that statement, I pride myself on making things from scratch, but in this instance I was in a pinch. The pie turned out alright, luckily it was a pie that had a lot going on with the filling so the crust was merely a delivery method.

Last week I found Bubby’s Homemade Pies by Ron Silver and Jen Bervin on the New Book shelf at my library. It’s an entertaining read, one of the few books that I have actually read the introduction to. In addition to an illustrated primer on the basics they have some AMAZING recipes. I am pretty sure that Pumpkin Pie with Caramel Sauce and Candied Pecans as well as Apple Ginger Honey pie will be making an appearance at this years Thanksgiving. But this time I opted to stick to something a little more basic. Searching in the kitchen revealed some crisp slightly tart apples and my decision was made. I used the All Butter Pastry-Pie Dough recipe, just an everyday recipe, nothing notably different then others I have tried. The trick is to keep it cold. Which I know is nothing new, but even though it was a chilly day in my kitchen I kept placed the dough back in the refrigerator after every action. The results speak for themselves. Is it possible to have pie crust TOO flakey?

Flakey Pie Crust bit

After chilling my dough I rolled it out into a rectangle and but it into four rectangles. I probably could have gotten six but I didn’t want to overwork the dough. I then place the dough in the fridge while I made the filling. I didn’t have a recipe, but just added what I usually do to apple pie.

1 crisp apple diced
2 T butter
pinch of salt
2-3 t cinnamon
1/4 t freshly grated nutmeg
1/2 ginger
2 T brown sugar
1-2 T flour

Put the butter in a small saucepan and heat till melted, add in the apple and cook still slightly softened. Then reduce heat to low and add the remaining ingredients. Stirring to combine. Let thicken slightly. Pull cut crusts out and proceed to dividing the filling between the pastry. Moisten the edges with water and fold over. Crimp the edges with a fork and brush the tops with an egg wash. I choose to then sprinkle the tops with some large granulated sugar. And don’t forget to use a sharp knife to vent the tops!

Apple HandpiesFilled Handpies

Ready to BakeBig Reveal


I put them back in the fridge for about 10 minutes before placing them in a 400 degree oven for about 20 minutes. They are done when the tops are beautifully brown and the edges look flakey. Make sure you let them cool so the filling sets up or else it will be runny!

Important note:: my oven is incredibly unreliable so your cooking time will probably differ!

So in the end I have learned a valuable lesson, always, ALWAYS keep the pie dough cold. Then only comment from Matt as he inhaled the handpies was that they could be a little sweeter! But all in all they were a success.

Little Bits of Heaven

This past weekend I had a hankering to bake, I’ll blame it on the deliciously cool weather, and I decided to give the yeast breads a go. I have made bread before with varying degrees of success and but decided to try a new recipe this time. I did some searching and chose this recipe from allrecipes.com. If you have never visited allrecipes before it can come in handy, especially the search feature that lets you enter ingredients that you want (and those you don’t!) and it will search their database. I have gotten some great recipes that way. Anyway, I wanted to take the cinnamon bread to a few places in the morning and did not want to wake up at 6 am on a Saturday so the overnight aspect seemed perfect.

I made just a few adjustments to the recipe. I added a little vanilla to the eggs before I mixed them in. Who doesn’t like a hint of vanilla? I did have a little trouble with getting the milk the right temperature before adding the yeast to it. I thought I would be smart and use a thermometer, but realized I was reading the Celsius side at about the time it registered 150+ on the Fahrenheit side. But to my defense the Celsius was in red and my eye was just draw to it! The milk escaped un-scalded and then I went about trying to cool it so it wouldn’t hurt the yeast (which if you have never worked with before is a little fickle). It was a tedious process of switching containers and pulling in and out of the refrigerator. Finally it was cool enough to add the yeast and follow the recipe as directed.

I got a little nervous because after an hour the dough did not seem to have doubled, but I was getting tired of waiting and proceeded to shaping the dough. Since I was going to be delivering these to a couple shops downtown I didn’t think that a traditional cinnamon roll shape would be easy to eat so I opted to make a pull-a-part, something I had never tried before. After punching down the dough I split it in half and then kept splitting the dough until I had pieces about the size of an unshelled walnut. Then I dipped each in a bowl of melted butter and then coated it in the cinnamon and sugar mixture. Sidenote: I like to add extra spice, there never seems to be enough in a recipe. I also added a little bit of ground ginger and some freshly grated nutmeg. Then I placed the pieces in buttered dishes and put them in the refrigerator to rise overnight.

I was skeptical, but when I checked on them in the morning they had filled out the dishes nicely and I popped them into the preheated oven. I will say that they didn’t take a long as a standard cinnamon roll would to bake. So keep an eye on them! When they came out I immediately drizzled a quick icing (milk, powdered sugar and vanilla) over the top. The icing in the recipe didn’t seem appealing, corn syrup? no thanks!

Cinnamon Pull-a-part

I was happy with the result, they weren’t quite as gooey as I would have liked, but I think that will just take some adjusting with baking time and temp. And next time I might add a little cream cheese to the icing to cut the raw powdered sugar taste. All in all a successful dive back into baking and a relatively easy alternative to those canned cinnamon rolls that tempt you at the grocery store but you know don’t really taste good!